Using Proxies with URL Profiler
If you’re thinking about using proxies with URL Profiler, it is most likely you are trying to check Google Indexation or Duplicate Content.
And with good reason, too, since these tasks require the software to scrape Google’s results pages.
Google’s Attitude Towards Scraping
In short, Google hate people scraping their search results. This has been the case for a long time, but they have started to clamp down on the behaviour more and more recently.
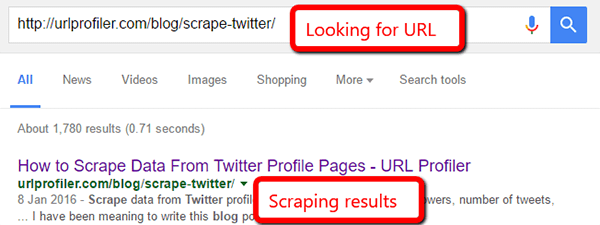
Most SEOs will probably have seen it in practice; doing some research or an audit, using a few advanced operators, then bam!
If they are doing it to you, after a few simple queries, think what they are doing to automated software that is scraping millions of results every day. So think of any SEO tool that provides keyword tracking, visibility scores, indexation reports – including all the big SaaS players, funded or not. Google is out to stop them from scraping its results.
Proxies and URL Profiler
URL Profiler is not exempt either, despite the scale of what the software allows in comparison to the major players. We have had support for proxies for a long while, but recently they have started to cause us a lot of issues, again, due to Google’s clampdown.
We previously recommended a supplier called Proxy-N-VPN, as we had found their proxies to be consistently reliable. Recently, however, this has not been the case.
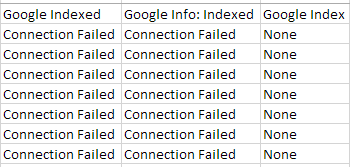
Support tickets have been coming of users getting ‘Connection Failed’ errors.
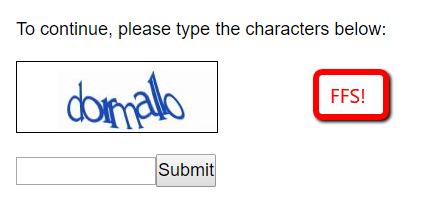
In almost every case, this has happened because a proxy is no longer ‘Google safe.’ This means that, when you use the proxy to query Google, it sends you to a CAPTCHA page (see above).
Again, this is nothing particularly new, as proxies would often get ‘burned out’ in the past, and be fine to use again some time later. Seemingly, however, this is no longer strictly the case.
From what we have seen, it seems as though Google have more sophisticated ways of identifying unnatural looking requests, and potentially the technology that provided the request. In other words, they seem better able to identify IP addresses as probable proxies, and are banning them permanently.
When I was dealing with Proxy-N-VPN, I would request or purchase ‘new’ proxies from them, and they would already be banned by Google before I’d even used them once. Cue ‘Connection Failed’ errors.
From my testing, and our customer experiences, it seemed clear to me that all, or most, of the proxies being provided by Proxy-N-VPN had been compromised.
Our New Recommended Provider: BuyProxies.org
After I realised the extent of the problem with Proxy-N-VPN, it seemed we needed to hunt out a new proxy provider. From the perspective of our customers, they were following our recommendation, and getting a bad experience as as result. Not good.
I thoroughly tested 5 new providers, some of which we had used in the past, others recommended by friends. Some of them were as bad as Proxy-N-VPN, if not worse, and others were sketchy – this problem is clearly widespread.
Eventually, I found a provider that was both reliable and recommended by industry peers: BuyProxies.org (aff).
New users may find my above commentary tiresome, but I wanted to include it so that existing customers understand exactly why our recommendation has changed. New customers simply need to sign up with BuyProxies.org and get on with it.
Proxies from BuyProxies.org
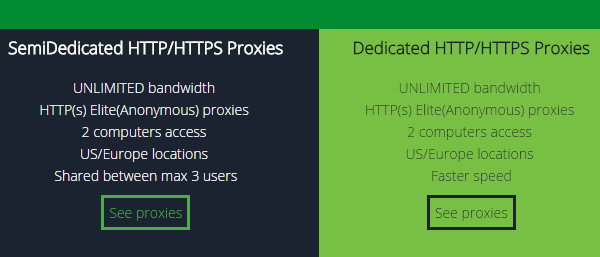
When you visit the BuyProxies.org website, you will be presented with 2 purchase options: Dedicated or Semi-Dedicated proxies.
The only relevant difference between these 2 options is the number of users sharing the proxies. With dedicated proxies, you will not be sharing the IPs with any other user – they are dedicated to your usage within the 30 day billing cycle. Semi-dedicated proxies will be shared between a maximum of 2 other users.
Semi-dedicated proxies are clearly more risky in terms of Google bans, particularly since you have no idea what the other users may be using them for. As such, our recommendation is to purchase dedicated proxies, where you can be sure that they are only used how you wish them to be used.
How Many Proxies to Buy
Technically, you’re not really buying proxies, you are just borrowing them. Maybe renting is a better word for it.
Anyway, the amount you’ll need depends on:
- How many URLs you need to profile
- How fast you wish to work
The table below will give you an idea of how to work out what you may need.
| No. Proxies | 1000 URLs Will Take | Suggested Max* |
| 10 | Approx 180 minutes | 1,250 URLs |
| 20 | Approx 90 minutes | 2,500 URLs |
| 50 | Approx 50 minutes | 6,500 URLs |
*Suggested maximum per profile
The timings are based only on the indexation check, so if you are also performing other tasks with URL Profiler at the same time (e.g. checking Moz metrics), this will cause additional time delays.
Please also be aware, that a number of things can cause extra time to be taken up. For example, some proxies are on worse connections, and therefore react more slowly.
Similarly, if proxies do start to fail, URL Profiler will rotate through your other proxies to try and get a positive result, which will add more time again. This is the reason for the suggested maximum, as the proxies will start to trip out and cause lots of ‘Connection Failed’ issues, if you go much beyond those suggested levels.
Proxy Authentication
When you go through the purchase process on BuyProxies.org, you will be prompted to choose a proxy username and password. These are the authentication credentials you will need to use in order to access your proxies. Don’t worry, this step actually makes it easier, not harder.
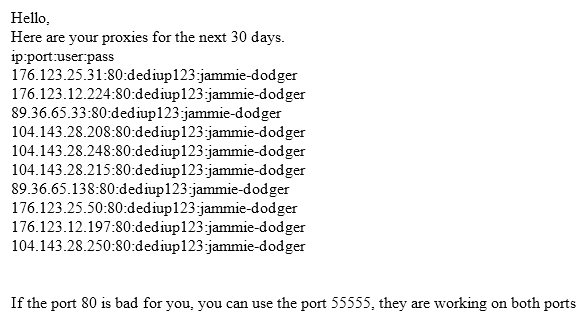
Once you have completed payment, it will take around 5 minutes for your proxies to be set up and configured for you. Then you will receive an email, confirming your proxy IP addresses and authentication credentials, which will look like this:
This uses the standard proxy format IP:Port:Username:Password – conveniently, this is exactly the same format we use in URL Profiler.
So in my case, the username I set up was dediup123, and the password was ‘jammie-dodger’ (a Jammie Dodger is an iconic British biscuit, which, quite frankly, if you’ve never tried, you are missing out on a vital life experience).
Notice that the email states ‘here are your proxies for the next 30 days‘. Once 30 days are up, you will be sent a new set. This kind of mandatory switching helps keep the proxies alive and working for everybody.
Proxy Authentication on Mac
Since the release of macOS Sierra, we have had some users complain of authentication issues when using proxies (this normally corresponds to a response of ‘Bad Request’).
These issues can be resolved by switching on IP authentication, which you can set up with your proxy provider quite easily.
With Buy Proxies, head to the client area and log in. Select the option ‘IP Authentication’ from the top navigation.
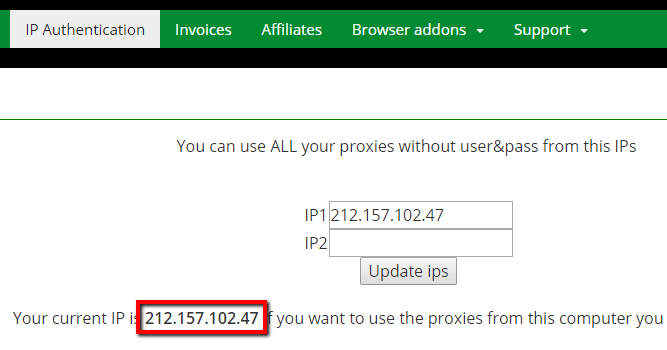
Enter the IP of the machine/location you access URL Profiler from (note that your current IP will be in the text underneath).
Adding Proxies to URL Profiler
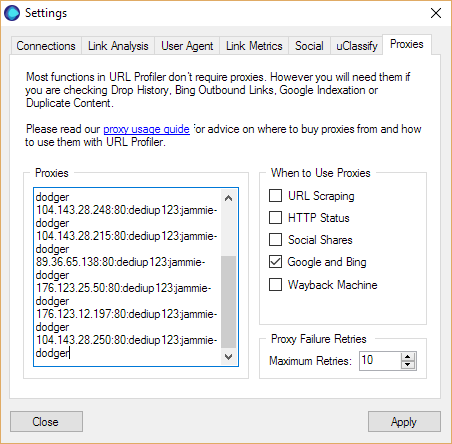
Once your email arrives, it is really easy to add these proxies to URL Profiler. Just copy the full list out of your email, open up URL Profiler and go to Settings -> Proxies.
Then paste your proxies into the box.
Don’t edit them at all, just paste them in exactly, so that they remain in the format IP:Port:Username:Password.
Once they are in, you need to select ‘When to Use Proxies’ from the tickboxes alongside. For indexation checks or duplicate content checks, this will just be ‘Google and Bing’.
For clarity, I will go through each option:
- URL Scraping – this is when you are scraping data from pages. So it would apply to Custom Scraper, Readability, Link Auditing, Email Address and Social Account scraping. You may wish to scrape some websites anonymously, or you may need to rotate requests to get past a finicky server.
- HTTP Status – when you are checking HTTP Status of a load of URLs, you may need proxies for similar reasons as above.
- Social Shares – when checking social share counts, some social networks can get fussy with you hitting their API with thousands of requests; using proxies helps to mitigate against this.
- Google and Bing – as we have already outlined.
- Wayback Machine – very rarely used, but if you are putting a big list through and checking Wayback Machine, you might wish to remain anonymous.
The setting at the bottom, ‘Proxy Failure Retries’, is recommended to set at 10. Sometimes, proxies will timeout or error, so with Proxy Failure Retries you can determine how often you want URL Profiler to retry the same URL with a different proxy.
Maintaining Your Proxies
If you’ve got this far down the article, you are probably keen on doing this right. So this final sections is just a bit of advice on how to make sure your proxies remain in an optimal state.
- You’ll be renting proxies for 30 days at a time. If you totally burn them out on day 1, you’ll have 29 more days to wait until you can try some new ones. Bear this in mind.
- Exercise caution when using them. If you rent 5 proxies, then try to check indexation on 20,000 URLs, you can’t expect this is going to fly under Google’s radar of ‘what looks like natural behaviour.’
- Expect around 10-15% ‘Connection Failed’ results, even if you stick to the suggested maximums. Don’t panic, just wait a few hours, then run the failures through again.
- Don’t use your proxies with other software. URL Profiler has built-in safeguards to protect your proxies, but other software may not. We suggest having a set of proxies for URL Profiler only.

